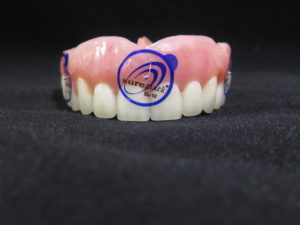
1. On a dry, well-fitting denture, place 6 x-ray markers:
Place 3 markers on the facial/buccal surface and an additional 3 markers on the lingual/palatal surface
Place the markers on varying axial planes
Example: if you place a marker on the buccal area of #2-3, then place your next marker on the lingual of #4-5, the next marker on the facial of #8-9 area and so on
*Do not place the markers on the intaglio surface of the denture*
2. Pre-Scan Patient Instructions:
Use a bite registration for separation, secure fit, and to eliminate rocking
Confirm fit by asking the patient “Is the denture fitting correctly?”
Breathe through your nose, close your eyes, and place the tongue at the back of the mouth
3. First Scan: Capture CBCT of ONLY the maxilla denture with x-ray markers.
Position appliance on a foam block
Orientate teeth occlusal DOWN
CBCT General Settings: 6cm – 8cm, 0.3 – 0.4 Voxel
4. Second Scan: Capture CBCT of ONLY the mandible denture with x-ray markers.
Position appliance on a foam block
Orientate teeth occlusal UP
CBCT General Settings: 6cm – 8cm, 0.3 – .4 Voxel
5. Third Scan: Capture CBCT of patient WEARING maxilla AND mandible dentures with x-ray markers.
Vital Anatomy to be captured:
Superior: Mid sinus / below orbit
Inferior: Chin and entire mandible
CBCT General Settings: Full 13cm
20cm, 0.3 – 0.4 Voxel
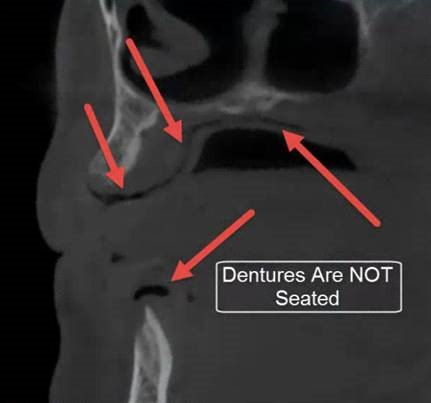
6. When scanning a patient following Dual Scan Protocol:
Review the scan carefully to ensure there is no “Black Air Space” between the denture and the soft tissue of the patient
Rejected Scan
Accepted Scan
7. Export and Upload the CBCT Scans to Implant Concierge
Export the CBCT scans individually, in a multi-file DICOM format to the desktop
Right-click on each folder, go to “Send To”, and select “Compressed (Zipped) Folder”
Upload both zipped/compressed folders to Implant Concierge
ATTENTION
Not all Implant Concierge services are available for all countries at this time.