1. On your desktop, right-click on an empty space. Go to “New” and click “Folder”. A folder will appear with highlighted blue text. Type in the patient name and push “Enter” on your keyboard.

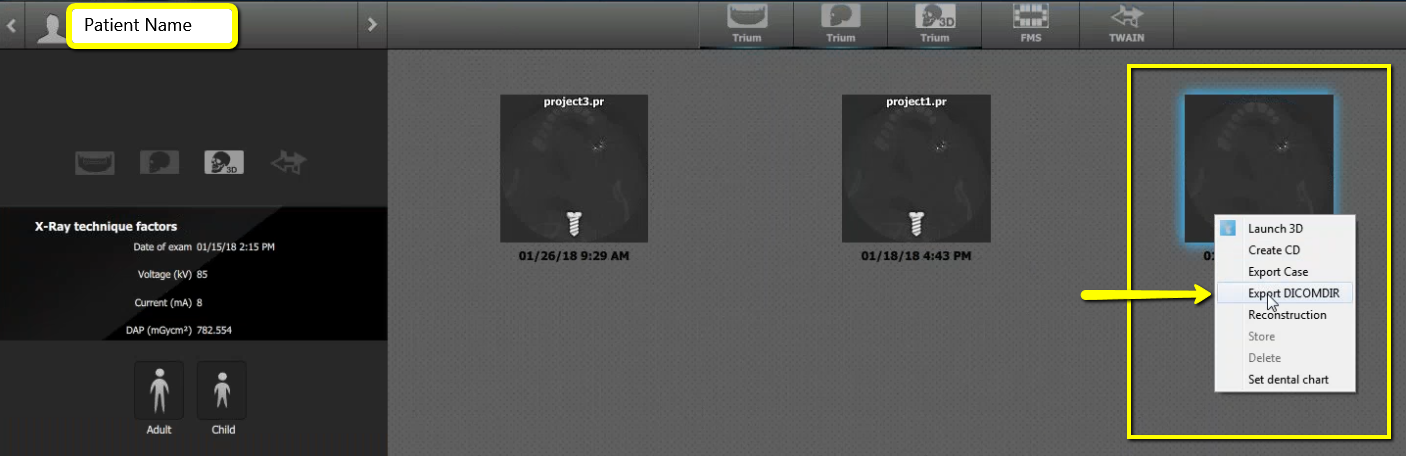
2. Open the patient history and right click on the tile of the newest CBCT. Select “Export DICOMDIR”.
3. Click the folder you made on the Desktop and click “Select Folder”.

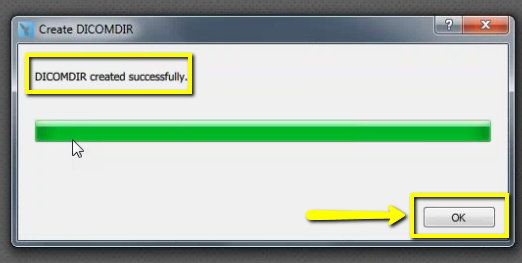
4. The DICOM will begin exporting. Click “OK” once complete.

5. After the DICOM exports and saves, go to the patients folder and verify the .dcm files were exported correctly; there should be several hundred files.

6. Go back to the desktop, right click on the patients folder, go to “Send to”, and select “Compressed (zipped) folder”. A duplicate folder will be made with either a zipper on it, or a blue “Z”. (*** If following a Dual Scan Protocol, please zip scans individually and label accordingly; i.e: “Patient Scan” and “Denture Scan” ***)

7. To upload the compressed folder, login to Implant Concierge. Click on the patient’s name to open the case. Click on the red “Upload DICOM” button.


8. Drag and drop the folder from the desktop to Implant Concierge. The file will automatically begin uploading.


9. Once the file reaches 100%, click the green “Complete” button.
