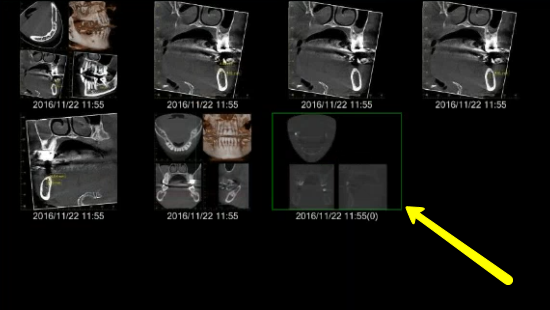
1. Locate patient in your database and open their case. 2. Click on the CBCT scan to select it, but do not open it. It should be outlined in green.
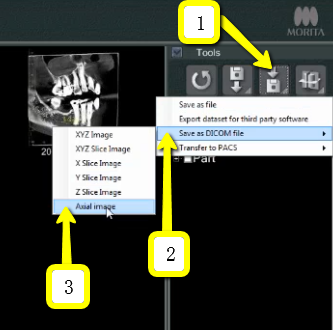
3. On the right side of the screen, click on “Save DICOM” button. Choose “Save as DICOM File”, then click “Axial Image”.
4. A box will pop-up titled “Slice Setting”. Change the “Interval” and “Thickness” to the lowest setting possible (about 0.160 for each setting). Then click “OK”.

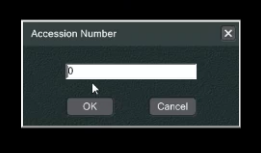
5. Accession Number should be 0. Click “OK”.
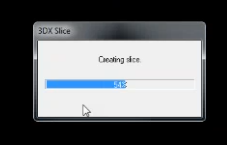
6. Your DICOM Files are now exporting.
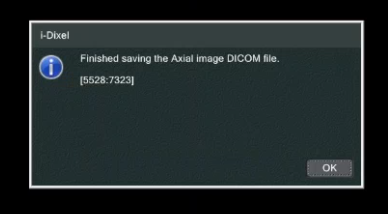
7. When complete, you will be prompted with a new alert window that says “Finished saving the Axial Image DICOM File”. Click “OK”
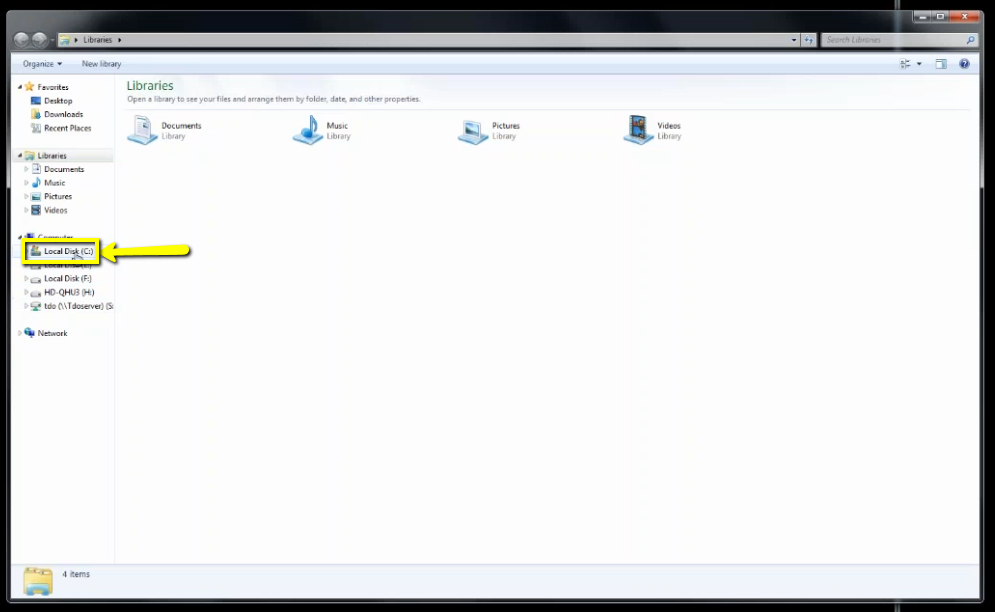
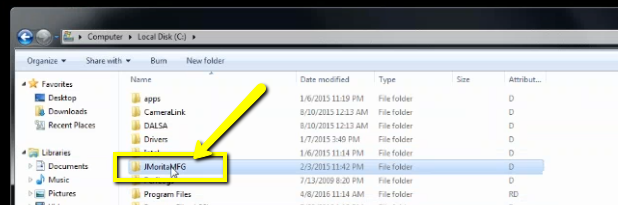
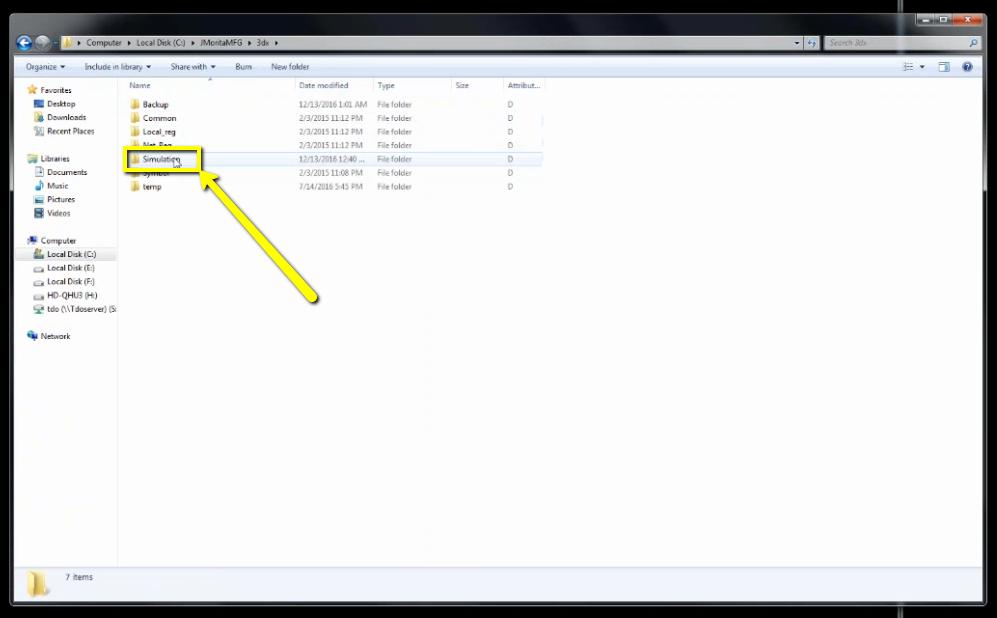
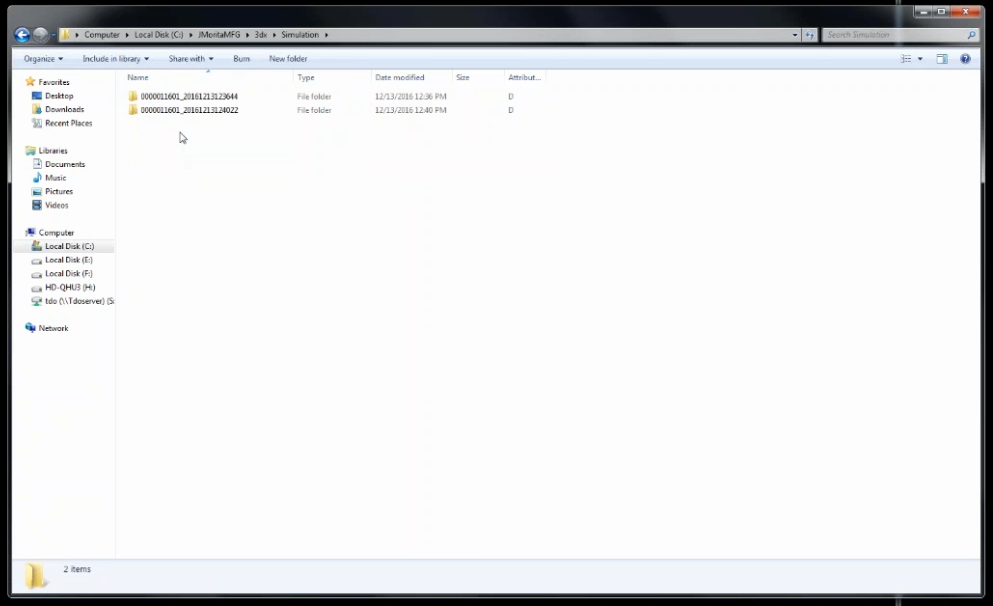
8. Locate these DICOM files by clicking on “Local Disk (C:)”, then “JMoritaMFG”, “3Dx”, “Simulation”.

9. Files will be labeled with patient number first, followed by date of scan.
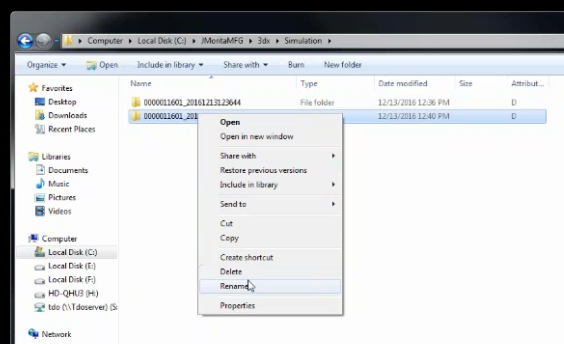
10. Once you have located the correct scan, right click on the folder, go to “Rename” and type “Patient Last Name, First Name”.
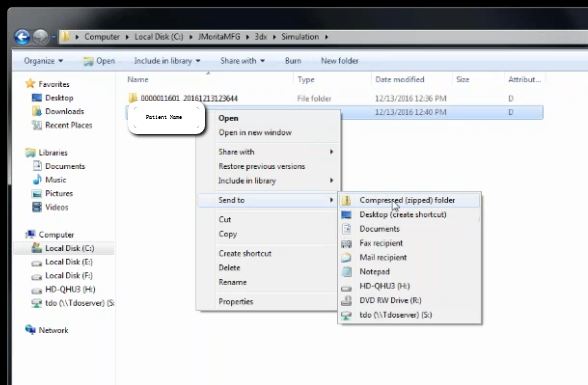
11. Right click on the patients folder, go to “Send to”, and select “Compressed (zipped) folder”. A duplicate folder will be made with either a zipper on it, or a blue “Z”. (*** If following a Dual Scan Protocol, please zip scans individually and label accordingly; i.e: “Patient Scan” and “Denture Scan” ***)
12. To upload the compressed folder, login to Implant Concierge. Click on the patient’s name to open the case. Click on the red “Upload DICOM” button.

13. Drag and drop the folder from the desktop to Implant Concierge. The file will automatically begin uploading.


14. Once the file reaches 100%, click the green “Complete” button.
