Creating a Partially Edentulous Case – Implant Concierge + You
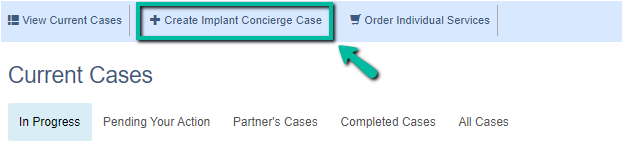
1. Login to Implant Concierge. Click on “Create Implant Concierge Case”

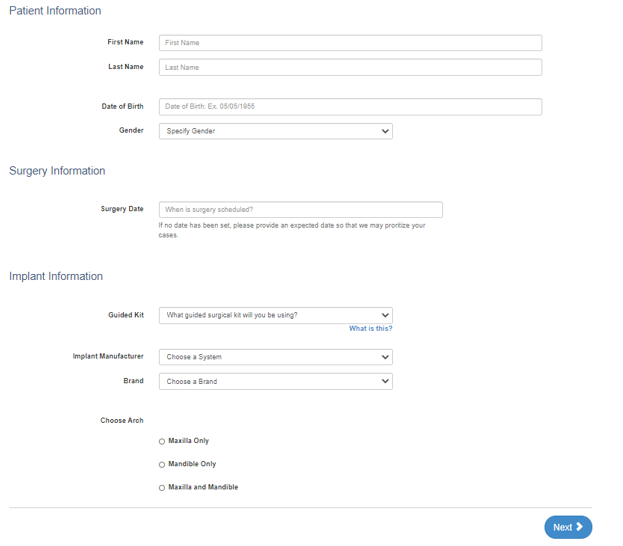
2. Specify ALL fields on this page. If a surgery date has not been scheduled, please put a date you would like the surgical guide by.

Then click the blue “Next” button.
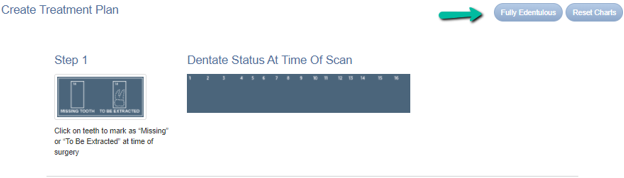
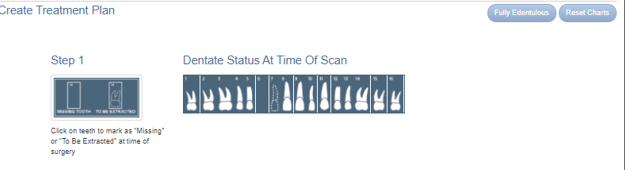
3. Fill out the tooth chart on Step 1 to reflect the patient’s dentition at the time of the scan. Click on a tooth once to designate it as “missing”. Click on the tooth twice to show a dotted outline of the tooth, indicating it will be extracted at the time of surgery. Clicking the tooth, a third time places the tooth back on the chart as present.

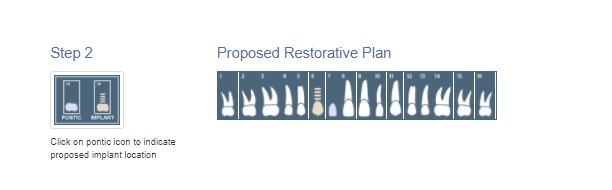
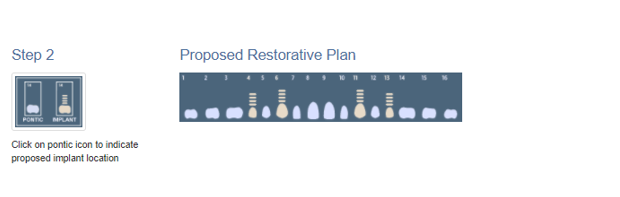
4. For the tooth chart on Step 2 (Proposed Restorative Plan), please specify your ideal implant sites. Click on the pontic site once to have a virtual implant placed there.
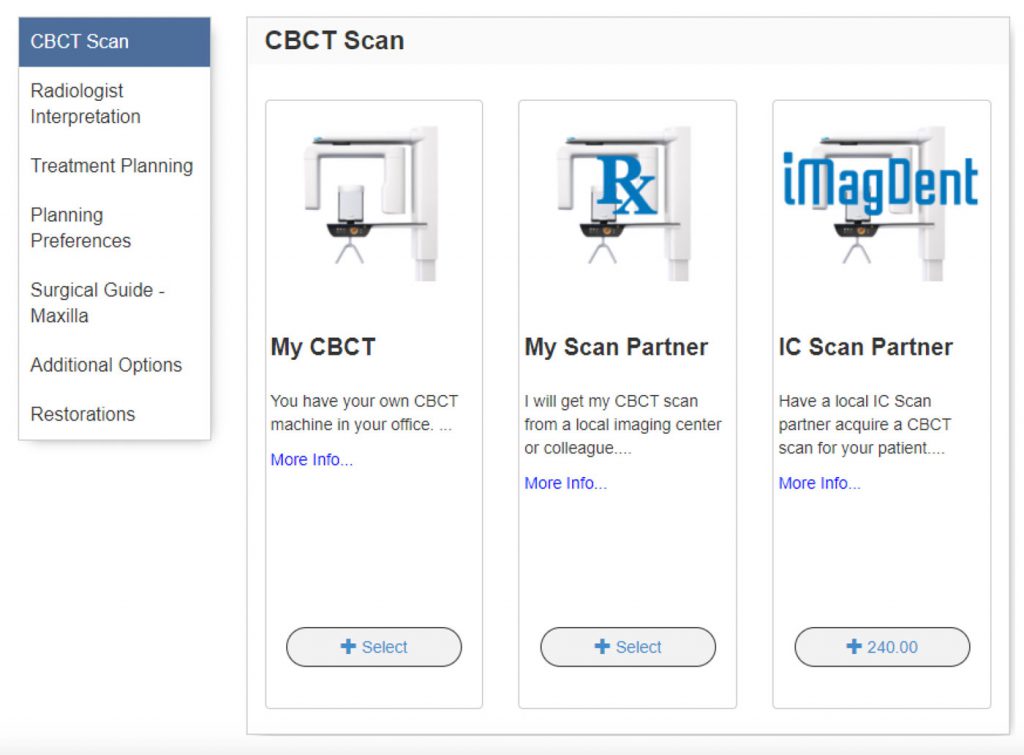
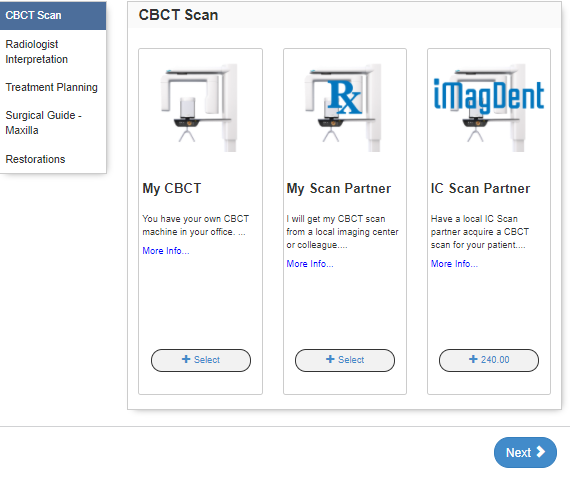
5. CBCT Scan: Specify how the CBCT was captured and click the blue “Next” button. Please note, CBCT will be uploaded after the case has been created.
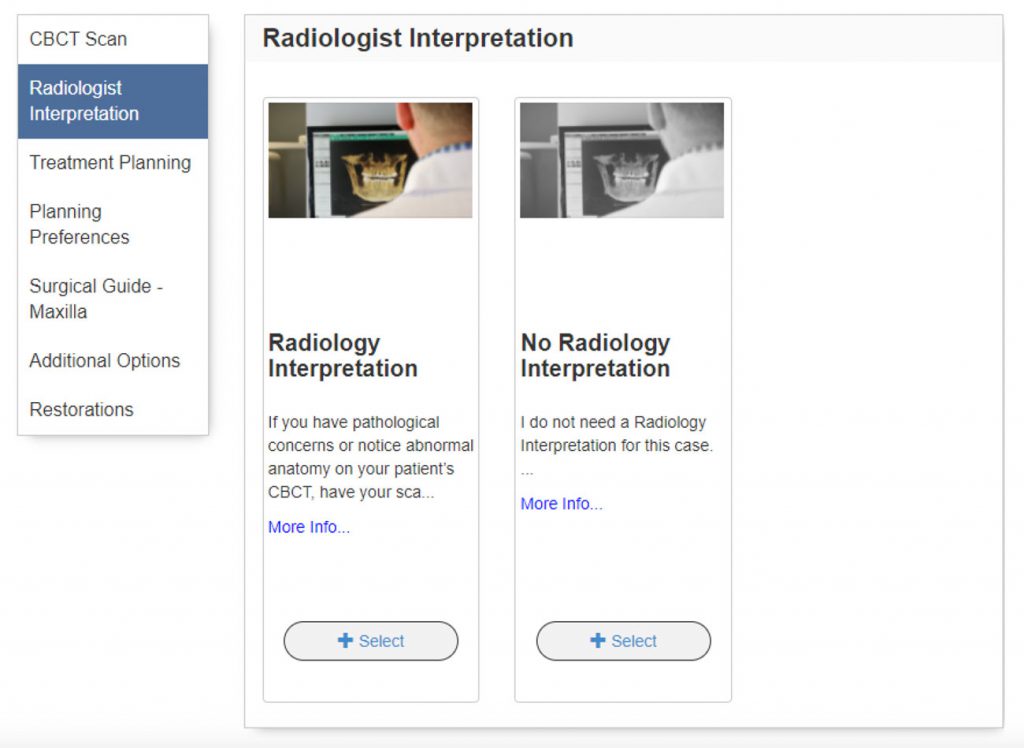
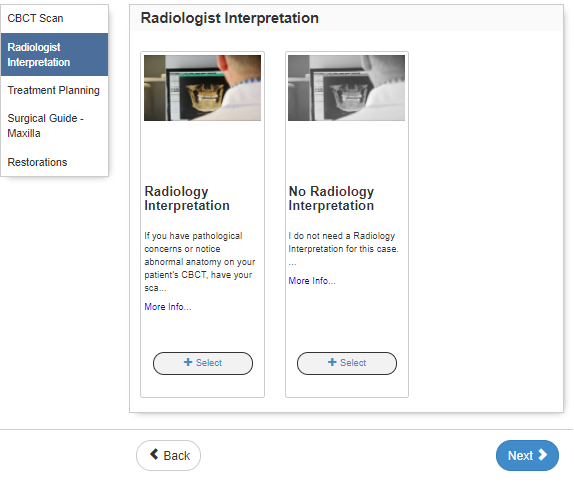
6. Radiologist Interpretation: If you have any anatomical or pathological concerns, you can have your CBCT interpreted by a Board Certified Maxillo-Facial Radiologist. Please provide your area of interest or specify a general reading in the provided text box. Please note, this is an optional service. If no interpretation is needed, please select “No Radiology Interpretation” and click the blue “Next” button.
7. Treatment Planning: Implant Concierge + YOU
– You hire Implant Concierge to be your virtual employee to create your initial treatment plan. You, the licensed clinician, will choose how to finalize the treatment plan.
Choose one of the three Finalize Options:
- I will finalize using RealGUIDE software a. You will download the free RealGUIDE planning software, download the treatment plan that Implant Concierge created, and finalize the implant placement yourself.
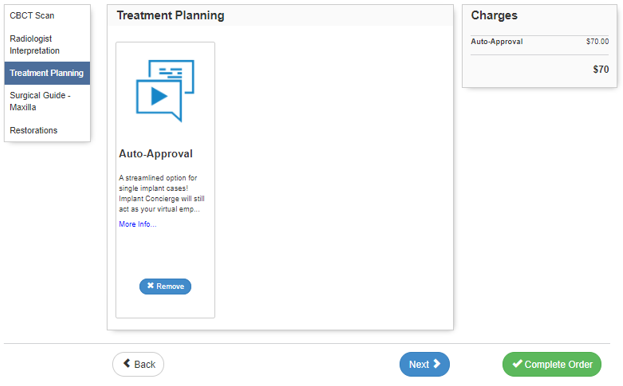
- Implant Concierge Auto-Approval
- Implant Concierge will finalize the plan by providing you a recording and screenshots of the implant placement in the software.
- Note Auto Approval services are for SINGLE implants only
- Implant Virtual Implant Planning a. Implant Concierge will host an online virtual meeting with an experience Case Coordinator and finalize the treatment plan with you.

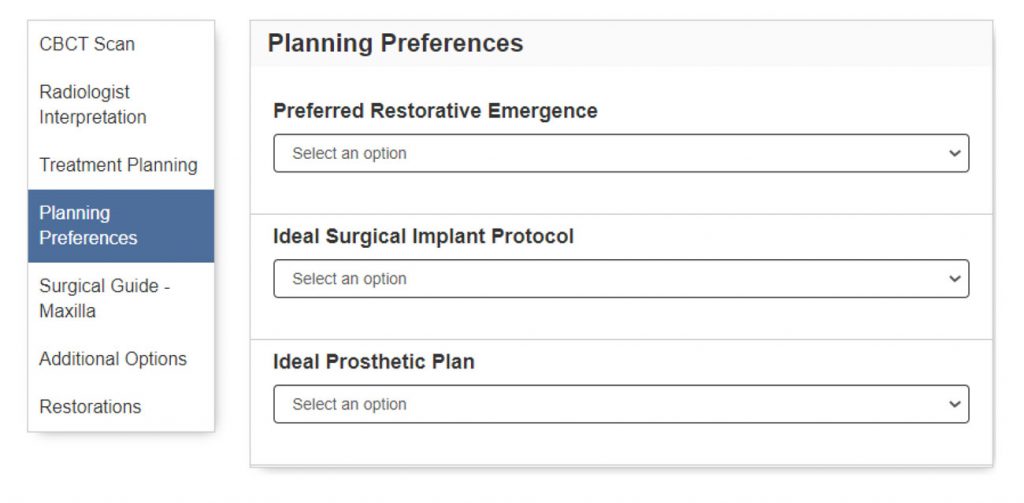
8. Planning Preferences:
a. Select your preferred Restorative Emergence, Ideal surgical implant protocol, and ideal prosthetic plan. Keep in mind, this is not required for all cases.
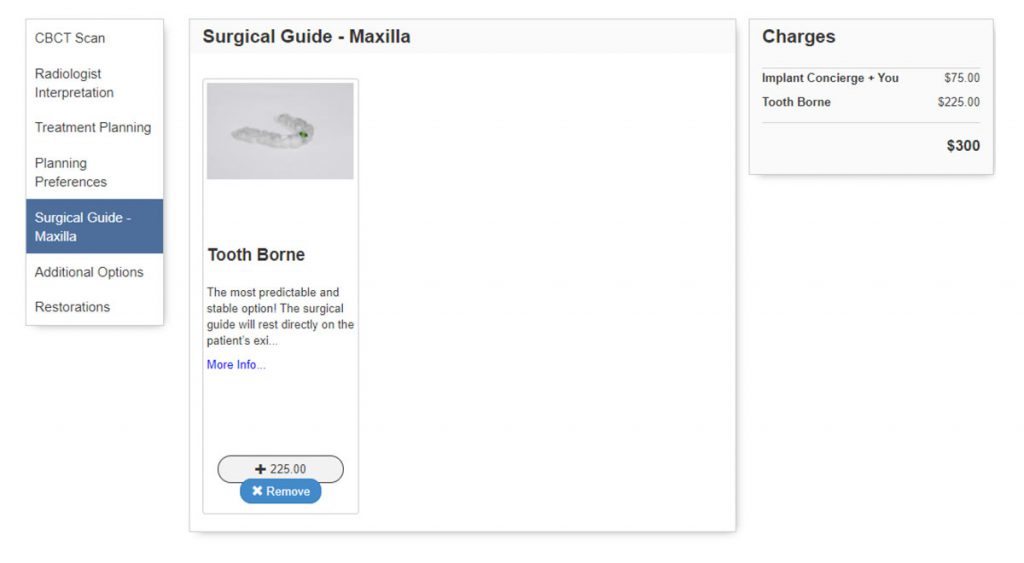
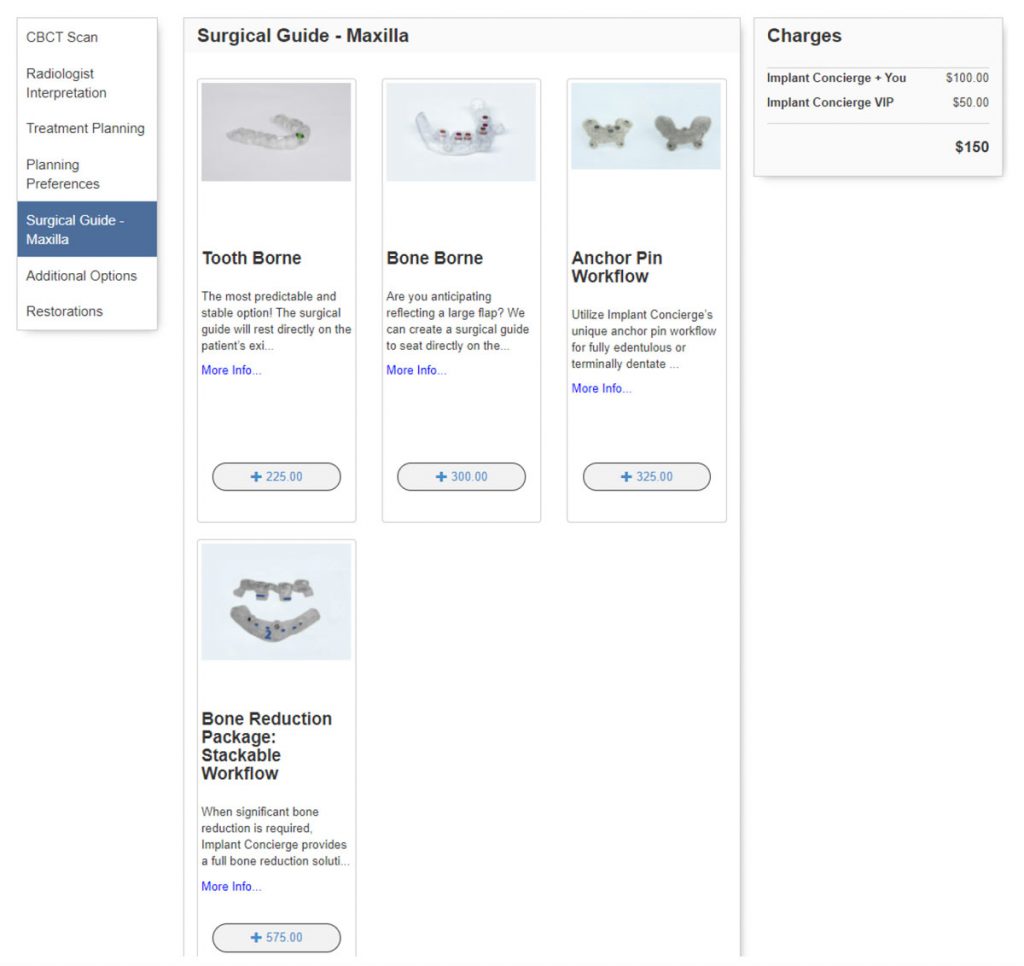
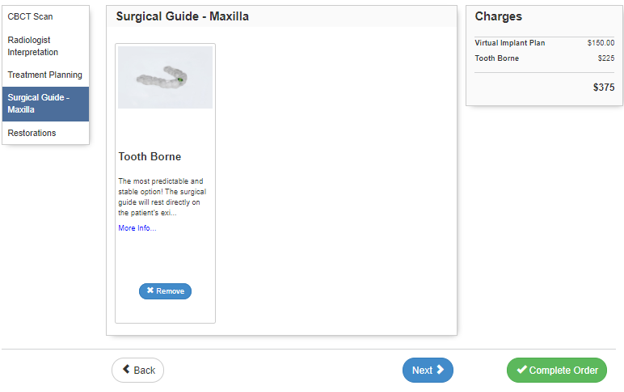
9. Surgical Guide: Select your tooth borne guide and click the blue “Next” button. Please note, your charges should be updated to include the surgical guide.
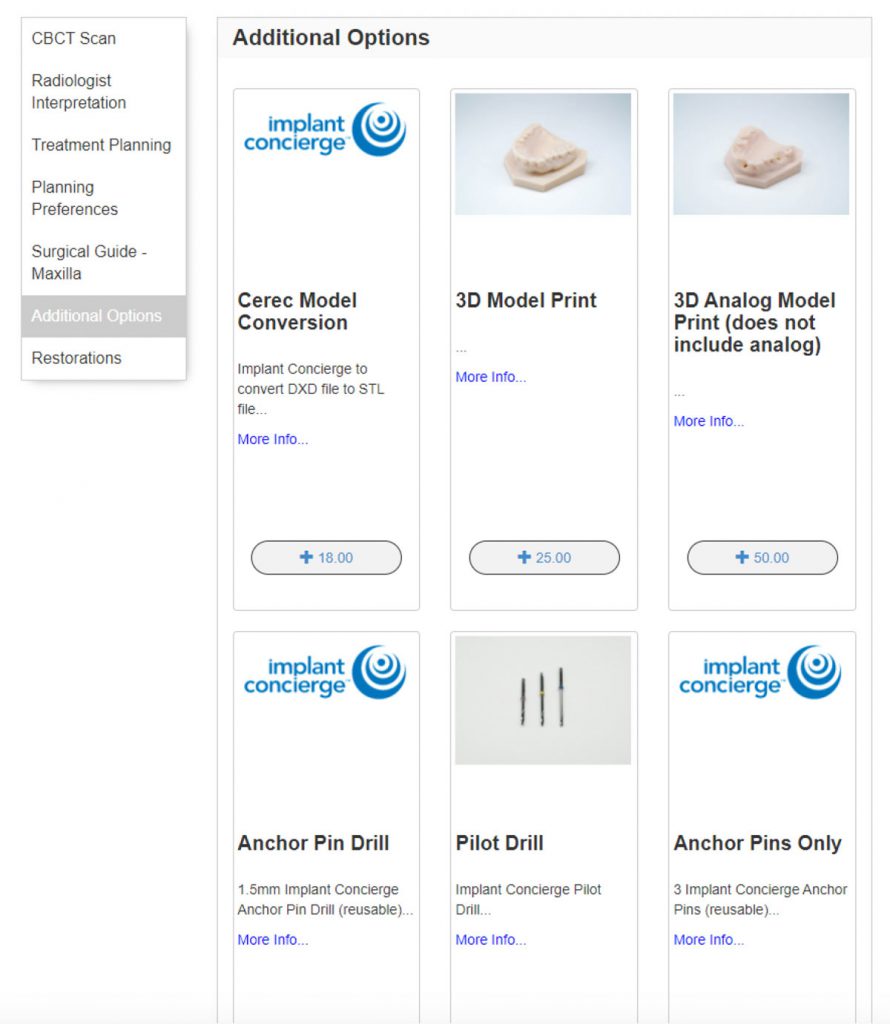
10. Additional Options a. Select additional products to be added to your case, if needed.
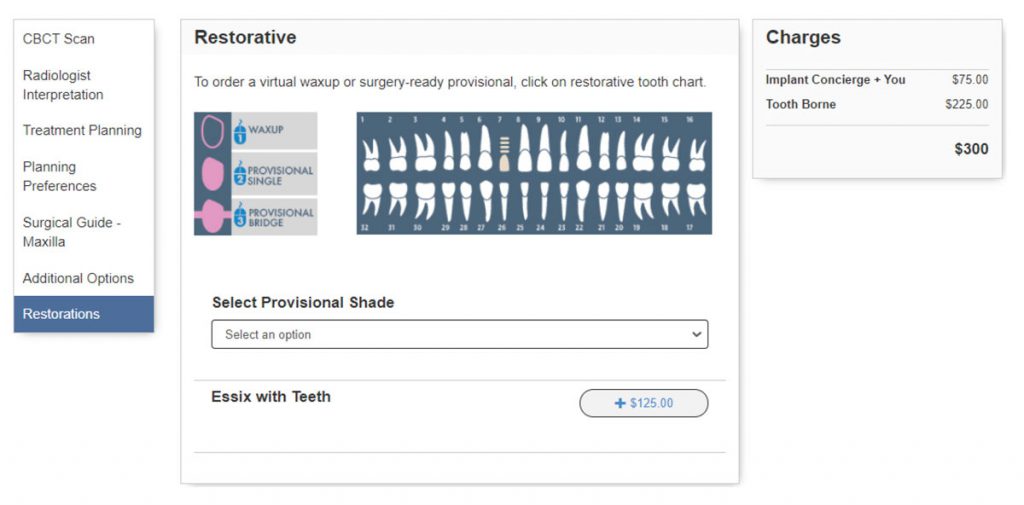
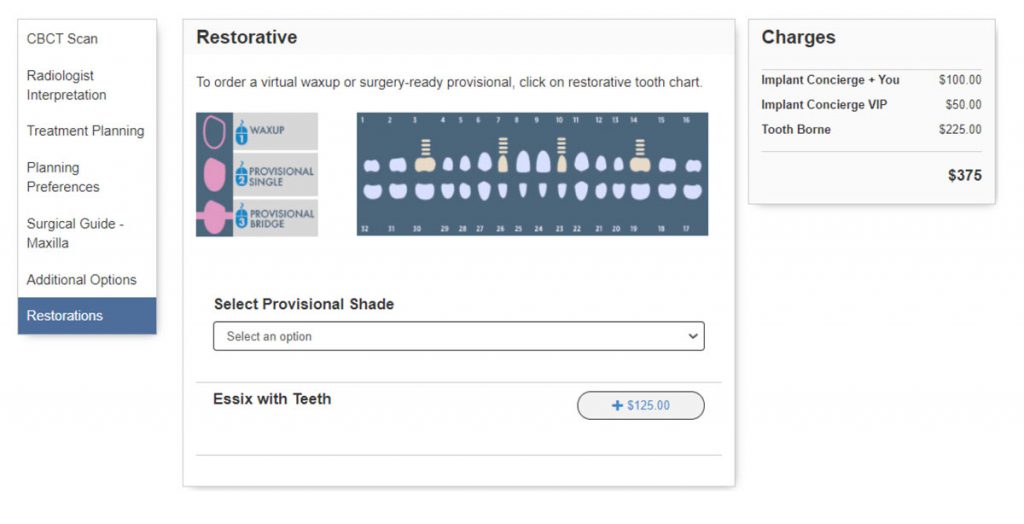
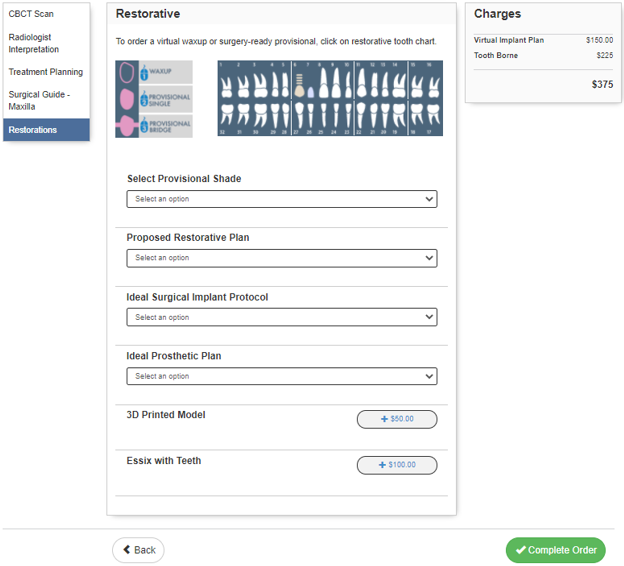
11. Restorations: *Optional Service
If you would like to have a virtual wax-up created, please click on the desired tooth once, and it will reflect with a pink outline.
If you would like a surgery-ready provisional, please click on the tooth twice, and a pink pontic will reflect. Please note, a virtual wax-up is included in the provisional fee.
If no restoration services are needed, you can skip this section completely and click the green “Complete Order” button.
Creating a Fully Edentulous Case
1. Login to Implant Concierge. Click on “Create Implant Concierge Case”
2. Specify ALL fields on this page. If a surgery date has not been scheduled, please put a date you would like the surgical guide by.

Then click the blue “Next” button.
3. Fill out the tooth chart on Step 1 to reflect the patient’s dentition at the time of the scan. Since the patient is fully edentulous, click on the Fully Edentulous button to mark all the teeth as missing.
4. For the tooth chart on Step 2 (Proposed Restorative Plan), please specify your ideal implant sites. Click on the pontic site once to have a virtual implant placed there
5. CBCT Scan: Specify how the CBCT was captured and click the blue “Next” button. Please note, CBCT will be uploaded after the case has been created.
6. Radiologist Interpretation: If you have any anatomical or pathological concerns, you can have your CBCT interpreted by a Board Certified Maxillo-Facial Radiologist. Please provide your area of interest or specify a general reading in the provided text box. Please note, this is an optional service. If no interpretation is needed, please select “No Radiology Interpretation” and click the blue “Next” button.
7. Treatment Planning: Implant Concierge + YOU
– You hire Implant Concierge to be your virtual employee to create your initial treatment plan. You, the licensed clinician, will choose how to finalize the treatment plan.
Choose one of the three Finalize Options:
- I will finalize using RealGUIDE software
- You will download the free RealGUIDE planning software, download the treatment plan that Implant Concierge created, and finalize the implant placement yourself.
- Implant Virtual Implant Planning
- Implant Concierge will host an online virtual meeting with an experience Case Coordinator and finalize the treatment plan with you.
8. Planning Preferences:
- Select your preferred Restorative Emergence, Ideal surgical implant protocol, and ideal prosthetic plan. Keep in mind, this is not required for all cases.
9. Surgical Guide: Select your tooth borne guide and click the blue “Next” button. Please note, your charges should be updated to include the surgical guide.
10. Additional Options a. Select additional products to be added to your case, if needed.

11. Restorations: *Optional Service
If you would like to have a virtual wax-up created, please click on the desired tooth once, and it will reflect with a pink outline.
If you would like a surgery-ready provisional, please click on the tooth twice, and a pink pontic will reflect. Please note, a virtual wax-up is included in the provisional fee.
If no restoration services are needed, you can skip this section completely and click the green “Complete Order” button.
Creating an Auto-Approval Case
1. Login to Implant Concierge. Click on “Create Implant Concierge Case”

2. Specify the patient information, guided surgical kit, and implant system in the corresponding fields.

Then click the blue “Next” button.
3. Fill out the tooth chart on Step 1 to reflect the patient’s dentition at the time of the scan. Click on a tooth once to designate it as “missing”. Click on the tooth a second time to show a dotted outline of the tooth, indicating it will be extracted at the time of surgery. Clicking the tooth a third time places the tooth back on the chart.

4. For the tooth chart on Step 2 (Proposed Restorative Plan), please specify your ideal implant sites. Click on the pontic site once to have a virtual implant placed there.

5. CBCT Scan:
Specify how the CBCT was captured and click the blue “Next” button. Please note, CBCT will be uploaded after the case has been created.
6. Radiologist Interpretation:
If you have any anatomical or pathological concerns, you can have your CBCT interpreted by our in-house Board Certified Maxillo-Facial Radiologist. Please provide your area of interest or instructions to the radiologist in the provided text box. Please note, this is an optional service. If no interpretation is needed, please select “No Radiology Interpretation” and click the blue “Next” button.
7. Treatment Planning:
Auto-Approval -This is a streamlined option for single implant cases! Implant Concierge will still act as your virtual employee and create an initial treatment plan from your CBCT and STL files. However, in place of a meeting, we will create a 2-3-minute patient-specific video and will also include screenshots of different angles and measurements for your review. Select Auto-Approval and click the blue “Next” button. Please note, your charges will reflect on the left-hand side.
*Auto-approval services are ONLY available for SINGLE IMPLANT cases*
8. Surgical Guide:
Select your tooth borne guide and click the blue “Next” button. Please note, your charges should be updated to include the surgical guide.
9. Restorations:
Please utilize the tooth chart if you are planning on requesting restorative services and products. If you would like to order a wax-up, please click on each tooth you would like included in the wax up and it will be reflected with a pink outline.
If you are planning on ordering a provisional, please click on a tooth twice to specify the requested provisional units Please note that the provisional charge will include a wax-up from Implant Concierge as well.
Once the tooth chart has been filled out, please fill out the restorative fields below. If no restoration services are requested, you can skip this section completely and click the green “Complete Order” button.
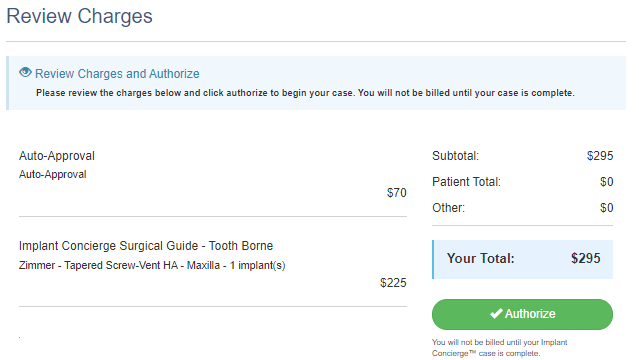
10. A summary of the requested services and products will now be shown. This page is for you to authorize our Implant Concierge team to begin working on your case. No charges will be incurred until the case is completed, therefore requested services and products can be adjusted throughout the life of the case as needed.
Creating a Treatment Plan Translation Case
1. Login to Implant Concierge. Click on “Create Implant Concierge Case”

2. Specify ALL fields on this page. If a surgery date has not been scheduled, please put a date you would like the surgical guide by.
Then click the blue “Next” button.
3. Fill out the tooth chart on Step 1 to reflect the patient’s dentition at the time of the scan. Click on a tooth once to designate it as “missing”. Click on the tooth twice to show a dotted outline of the tooth, indicating it will be extracted at the time of surgery. Clicking the tooth, a third time places the tooth back on the chart as present.
4. For the tooth chart on Step 2 (Proposed Restorative Plan), please specify your ideal implant sites. Click on the pontic site once to have a virtual implant placed there.

5. CBCT Scan: Specify how the CBCT was captured and click the blue “Next” button. Please note, CBCT will be uploaded after the case has been created.
6. Radiologist Interpretation: If you have any anatomical or pathological concerns, you can have your CBCT interpreted by a Board Certified Maxillo-Facial Radiologist. Please provide your area of interest or specify a general reading in the provided text box. Please note, this is an optional service. If no interpretation is needed, please select “No Radiology Interpretation” and click the blue “Next” button.
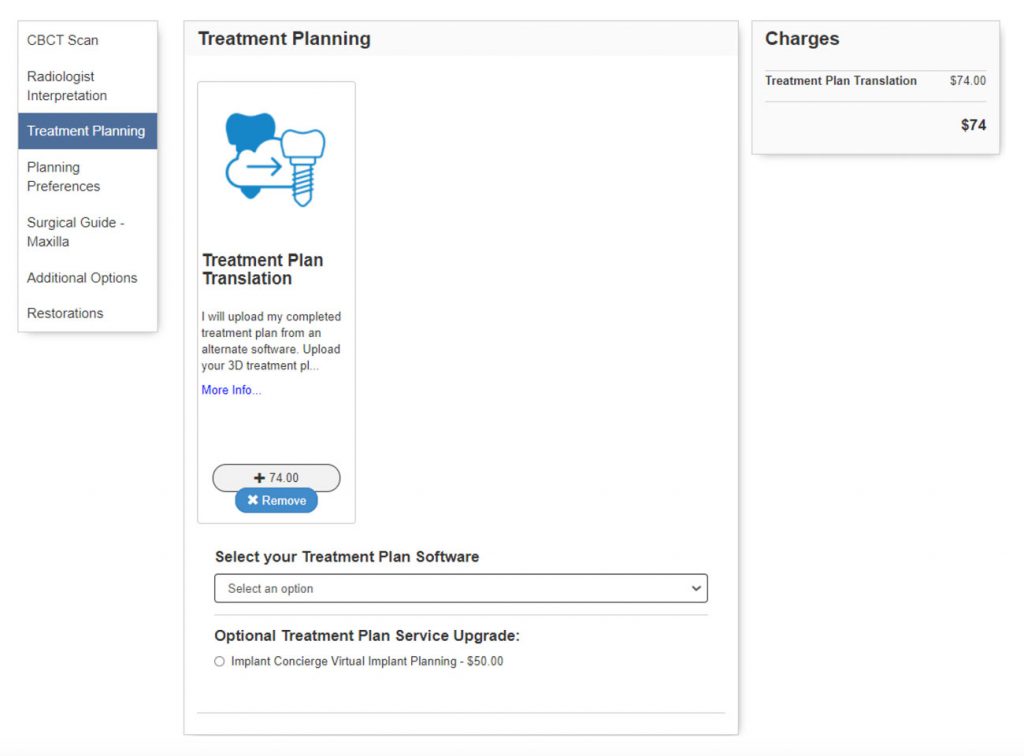
7. Treatment Planning:
Treatment Plan Translation – Upload your 3D treatment plan in one of our approved software formats along with your CBCT scan and your STL files or diagnostic casts. Once the files have been reviewed and accepted, Implant Concierge will translate your treatment plan into the RealGUIDE software for surgical guide design and fabrication. Select Treatment Plan Translation specify the treatment planning software you used in the drop-down. Then click the blue “Next” button. Please note, your charges will reflect on the right-hand side
*Option to Upgrade to Implant Concierge Virtual Implant Planning if needed.
*Translation services are ONLY available for PARTIALLY EDENTULOUS cases*
8. Planning Preferences:
– Select your preferred Restorative Emergence, Ideal surgical implant protocol, and ideal prosthetic plan. Keep in mind, this is not required for all cases.
9. Surgical Guide: Select your tooth borne guide and click the blue “Next” button. Please note, your charges should be updated to include the surgical guide.
10. Additional Options
– Select additional products to be added to your case, if needed.
11. Restorations: *Optional Service
If you would like to have a virtual wax-up created, please click on the desired tooth once, and it will reflect with a pink outline.
If you would like a surgery-ready provisional, please click on the tooth twice, and a pink pontic will reflect. Please note, a virtual wax-up is included in the provisional fee.
If no restoration services are needed, you can skip this section completely and click the green “Complete Order” button.
1. Login to your Implant Concierge account.

2. Click “Order Individual Services”.

3. Click the button “Radiology Interpretation Only”.

4. Fill out the patient’s name, date of birth, gender, and the arch of interest.

5. Fill out the area of interest. Please be as detailed as possible.

6. Select the school that you would like to interpret the CBCT scan, and click “I Authorize”.

Simple Partially Edentulous Workflow

Immediate Extract/Immediate Place Workflow

Complex Partially Edentulous Workflow

Fully Edentulous Workflow
